tadgallery是一套多功能的相簿模組,為tad老師所開發,也是目前Xoops使用率最高的相簿模組,不過目前發現一個問題,就是開啟相片捲軸區塊啟用燈箱效果時下方的詳細內容按鈕連結失效問題,為了先確認是否為系統環境造成的,我吧以下套件都改成tad的來做測試。

模組:
tadtools => 3.19最新版
tad_themes => 4.9最新版
tadgallery => 3.79最新版
佈景: => school2015最新版
都更換好配置後在測試燈箱效果,結果詳細內容還是一樣sn為空值

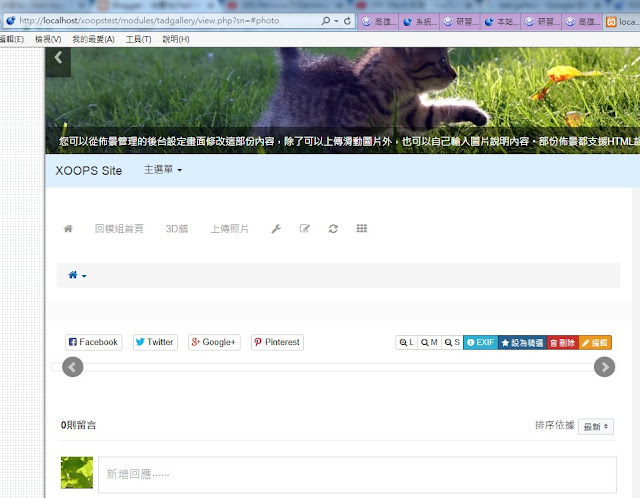
點了詳細內容因為sn沒值所以開啟的是空值頁面,沒內容的,初步排除是系統兼容問題。
沒辦法了阿,這樣是無法跟客戶交差的,只好動手來處理了,發現問題是出在blocks/colorbox.tpl這支檔的<{$block.sn}>為空值,相片捲軸既然是跑回圈的,那sn因該也是迴圈產生,所以修改了一下程式即可,
先找到tadgallery_block_carousel.tpl樣板檔,用筆記本打開
(在tadgallery/templates/blocks/tadgallery_block_carousel.tpl)
原本的code
<{if $block.pics}>
<style type="text/css" media="all">
.list_carousel {
position: relative;
}
.list_carousel ul {
margin: 0;
padding: 0;
list-style: none;
display: block;
}
.list_carousel li {
padding: 0;
margin: 0px;
display: block;
float: left;
}
.list_carousel.responsive {
width: auto;
margin-left: 0;
}
.clearfix {
float: none;
clear: both;
}
a.tadgallery_carousel_prev, a.tadgallery_carousel_next {
background: url('<{$xoops_url}>/modules/tadgallery/images/miscellaneous_sprite.png') no-repeat transparent;
width: 45px;
height: 50px;
display: block;
position: absolute;
top: 45px;
}
a.tadgallery_carousel_prev { left: -22px;
background-position: 0 0; }
a.tadgallery_carousel_prev:hover { background-position: 0 -50px; }
a.tadgallery_carousel_prev.disabled { background-position: 0 -100px !important; }
a.tadgallery_carousel_next { right: -22px;
background-position: -50px 0; }
a.tadgallery_carousel_next:hover { background-position: -50px -50px; }
a.tadgallery_carousel_next.disabled { background-position: -50px -100px !important; }
a.tadgallery_carousel_prev.disabled, a.tadgallery_carousel_next.disabled {
cursor: default;
}
a.tadgallery_carousel_prev span, a.tadgallery_carousel_next span {
display: none;
}
</style>
<script type="text/javascript">
$(function() {
$('#carousel<{$block.view_csn}>').carouFredSel({
<{$block.vertical}>
width: '100%',
height: <{$block.vertical_height}>,
<{$block.scroll}>
prev : {
button : "#foo2_tadgallery_carousel_prev<{$block.view_csn}>",
key : "left"
},
next : {
button : "#foo2_tadgallery_carousel_next<{$block.view_csn}>",
key : "right"
},
<{if $block.staytime}>
auto: <{$block.staytime}>,
<{/if}>
mouseWheel: true
});
});
</script>
<div class="list_carousel">
<ul id="carousel<{$block.view_csn}>">
<{foreach from=$block.pics item=p}>
<li>
<a href="<{$p.link}>" data-photo="<{$p.pic_url}>" <{$p.fancy_class}>>
<img src="<{$p.pic_url}>" alt="<{$p.photo_title}>" title="<{$p.photo_title}>" style="<{if $p.direction=="1"}>width:<{$p.width}>px;<{else}>height:<{$p.height}>px;<{/if}>margin:0px 2px;"></a>
</li>
<{/foreach}>
</ul>
<div class="clearfix"></div>
<a class="tadgallery_carousel_prev" id="foo2_tadgallery_carousel_prev<{$block.view_csn}>" href="#"><span>prev</span></a>
<a class="tadgallery_carousel_next" id="foo2_tadgallery_carousel_next<{$block.view_csn}>" href="#"><span>next</span></a>
</div>
<{includeq file="$xoops_rootpath/modules/tadgallery/templates/blocks/colorbox.tpl"}>
<{/if}>
替換為以下的code(複製貼上即可)
<{if $block.pics}>
<style type="text/css" media="all">
.list_carousel {
position: relative;
}
.list_carousel ul {
margin: 0;
padding: 0;
list-style: none;
display: block;
}
.list_carousel li {
padding: 0;
margin: 0px;
display: block;
float: left;
}
.list_carousel.responsive {
width: auto;
margin-left: 0;
}
.clearfix {
float: none;
clear: both;
}
a.tadgallery_carousel_prev, a.tadgallery_carousel_next {
background: url('<{$xoops_url}>/modules/tadgallery/images/miscellaneous_sprite.png') no-repeat transparent;
width: 45px;
height: 50px;
display: block;
position: absolute;
top: 45px;
}
a.tadgallery_carousel_prev { left: -22px;
background-position: 0 0; }
a.tadgallery_carousel_prev:hover { background-position: 0 -50px; }
a.tadgallery_carousel_prev.disabled { background-position: 0 -100px !important; }
a.tadgallery_carousel_next { right: -22px;
background-position: -50px 0; }
a.tadgallery_carousel_next:hover { background-position: -50px -50px; }
a.tadgallery_carousel_next.disabled { background-position: -50px -100px !important; }
a.tadgallery_carousel_prev.disabled, a.tadgallery_carousel_next.disabled {
cursor: default;
}
a.tadgallery_carousel_prev span, a.tadgallery_carousel_next span {
display: none;
}
</style>
<script type="text/javascript">
$(function() {
$('#carousel<{$block.view_csn}>').carouFredSel({
<{$block.vertical}>
width: '100%',
height: <{$block.vertical_height}>,
<{$block.scroll}>
prev : {
button : "#foo2_tadgallery_carousel_prev<{$block.view_csn}>",
key : "left"
},
next : {
button : "#foo2_tadgallery_carousel_next<{$block.view_csn}>",
key : "right"
},
<{if $block.staytime}>
auto: <{$block.staytime}>,
<{/if}>
mouseWheel: true
});
});
</script>
<div class="list_carousel">
<ul id="carousel<{$block.view_csn}>">
<{foreach from=$block.pics item=p}>
<li>
<a href="<{$p.link}>" data-photo="<{$p.pic_url}>" class="tad_gallery_colorbox_<{$p.photo_sn}>">
<img src="<{$p.pic_url}>" alt="<{$p.photo_title}>" title="<{$p.photo_title}>" style="<{if $p.direction=="1"}>width:<{$p.width}>px;<{else}>height:<{$p.height}>px;<{/if}>margin:0px 2px;"></a>
</li>
<{/foreach}>
</ul>
<div class="clearfix"></div>
<a class="tadgallery_carousel_prev" id="foo2_tadgallery_carousel_prev<{$block.view_csn}>" href="#"><span>prev</span></a>
<a class="tadgallery_carousel_next" id="foo2_tadgallery_carousel_next<{$block.view_csn}>" href="#"><span>next</span></a>
</div>
<{/if}>
<{foreach from=$block.pics item=p}>
<script>
$(function(){
$('.tad_gallery_colorbox_<{$p.photo_sn}>').colorbox({rel:'group', photo:true, maxWidth:'100%', maxHeight:'100%', title: function(){
// var sn = $(this).attr('title');
return '<a href="<{$xoops_url}>/modules/tadgallery/view.php?sn=<{$p.photo_sn}>#photo<{$p.photo_sn}>" target="_blank"><{$smarty.const._MB_TADGAL_VIEW_PHOTO}></a>';
}});
});
</script>
<{/foreach}>
在測試看看,點選燈箱效果,看看sn是否有值

確認紅框的sn是有數值的,然後點看看進到內容頁是否正確顯示圖片!

確認每張圖片都能進到對應的內容頁面中,圖片也能正常顯示,燈箱也能正常運作,搞定可以跟客戶交差了,真感動,有需要的朋友參考看看喔
教學撰寫:徐嘉裕 Neil hsu

模組:
tadtools => 3.19最新版
tad_themes => 4.9最新版
tadgallery => 3.79最新版
佈景: => school2015最新版
都更換好配置後在測試燈箱效果,結果詳細內容還是一樣sn為空值

點了詳細內容因為sn沒值所以開啟的是空值頁面,沒內容的,初步排除是系統兼容問題。

沒辦法了阿,這樣是無法跟客戶交差的,只好動手來處理了,發現問題是出在blocks/colorbox.tpl這支檔的<{$block.sn}>為空值,相片捲軸既然是跑回圈的,那sn因該也是迴圈產生,所以修改了一下程式即可,
先找到tadgallery_block_carousel.tpl樣板檔,用筆記本打開
(在tadgallery/templates/blocks/tadgallery_block_carousel.tpl)
原本的code
<{if $block.pics}>
<style type="text/css" media="all">
.list_carousel {
position: relative;
}
.list_carousel ul {
margin: 0;
padding: 0;
list-style: none;
display: block;
}
.list_carousel li {
padding: 0;
margin: 0px;
display: block;
float: left;
}
.list_carousel.responsive {
width: auto;
margin-left: 0;
}
.clearfix {
float: none;
clear: both;
}
a.tadgallery_carousel_prev, a.tadgallery_carousel_next {
background: url('<{$xoops_url}>/modules/tadgallery/images/miscellaneous_sprite.png') no-repeat transparent;
width: 45px;
height: 50px;
display: block;
position: absolute;
top: 45px;
}
a.tadgallery_carousel_prev { left: -22px;
background-position: 0 0; }
a.tadgallery_carousel_prev:hover { background-position: 0 -50px; }
a.tadgallery_carousel_prev.disabled { background-position: 0 -100px !important; }
a.tadgallery_carousel_next { right: -22px;
background-position: -50px 0; }
a.tadgallery_carousel_next:hover { background-position: -50px -50px; }
a.tadgallery_carousel_next.disabled { background-position: -50px -100px !important; }
a.tadgallery_carousel_prev.disabled, a.tadgallery_carousel_next.disabled {
cursor: default;
}
a.tadgallery_carousel_prev span, a.tadgallery_carousel_next span {
display: none;
}
</style>
<script type="text/javascript">
$(function() {
$('#carousel<{$block.view_csn}>').carouFredSel({
<{$block.vertical}>
width: '100%',
height: <{$block.vertical_height}>,
<{$block.scroll}>
prev : {
button : "#foo2_tadgallery_carousel_prev<{$block.view_csn}>",
key : "left"
},
next : {
button : "#foo2_tadgallery_carousel_next<{$block.view_csn}>",
key : "right"
},
<{if $block.staytime}>
auto: <{$block.staytime}>,
<{/if}>
mouseWheel: true
});
});
</script>
<div class="list_carousel">
<ul id="carousel<{$block.view_csn}>">
<{foreach from=$block.pics item=p}>
<li>
<a href="<{$p.link}>" data-photo="<{$p.pic_url}>" <{$p.fancy_class}>>
<img src="<{$p.pic_url}>" alt="<{$p.photo_title}>" title="<{$p.photo_title}>" style="<{if $p.direction=="1"}>width:<{$p.width}>px;<{else}>height:<{$p.height}>px;<{/if}>margin:0px 2px;"></a>
</li>
<{/foreach}>
</ul>
<div class="clearfix"></div>
<a class="tadgallery_carousel_prev" id="foo2_tadgallery_carousel_prev<{$block.view_csn}>" href="#"><span>prev</span></a>
<a class="tadgallery_carousel_next" id="foo2_tadgallery_carousel_next<{$block.view_csn}>" href="#"><span>next</span></a>
</div>
<{includeq file="$xoops_rootpath/modules/tadgallery/templates/blocks/colorbox.tpl"}>
<{/if}>
替換為以下的code(複製貼上即可)
<{if $block.pics}>
<style type="text/css" media="all">
.list_carousel {
position: relative;
}
.list_carousel ul {
margin: 0;
padding: 0;
list-style: none;
display: block;
}
.list_carousel li {
padding: 0;
margin: 0px;
display: block;
float: left;
}
.list_carousel.responsive {
width: auto;
margin-left: 0;
}
.clearfix {
float: none;
clear: both;
}
a.tadgallery_carousel_prev, a.tadgallery_carousel_next {
background: url('<{$xoops_url}>/modules/tadgallery/images/miscellaneous_sprite.png') no-repeat transparent;
width: 45px;
height: 50px;
display: block;
position: absolute;
top: 45px;
}
a.tadgallery_carousel_prev { left: -22px;
background-position: 0 0; }
a.tadgallery_carousel_prev:hover { background-position: 0 -50px; }
a.tadgallery_carousel_prev.disabled { background-position: 0 -100px !important; }
a.tadgallery_carousel_next { right: -22px;
background-position: -50px 0; }
a.tadgallery_carousel_next:hover { background-position: -50px -50px; }
a.tadgallery_carousel_next.disabled { background-position: -50px -100px !important; }
a.tadgallery_carousel_prev.disabled, a.tadgallery_carousel_next.disabled {
cursor: default;
}
a.tadgallery_carousel_prev span, a.tadgallery_carousel_next span {
display: none;
}
</style>
<script type="text/javascript">
$(function() {
$('#carousel<{$block.view_csn}>').carouFredSel({
<{$block.vertical}>
width: '100%',
height: <{$block.vertical_height}>,
<{$block.scroll}>
prev : {
button : "#foo2_tadgallery_carousel_prev<{$block.view_csn}>",
key : "left"
},
next : {
button : "#foo2_tadgallery_carousel_next<{$block.view_csn}>",
key : "right"
},
<{if $block.staytime}>
auto: <{$block.staytime}>,
<{/if}>
mouseWheel: true
});
});
</script>
<div class="list_carousel">
<ul id="carousel<{$block.view_csn}>">
<{foreach from=$block.pics item=p}>
<li>
<a href="<{$p.link}>" data-photo="<{$p.pic_url}>" class="tad_gallery_colorbox_<{$p.photo_sn}>">
<img src="<{$p.pic_url}>" alt="<{$p.photo_title}>" title="<{$p.photo_title}>" style="<{if $p.direction=="1"}>width:<{$p.width}>px;<{else}>height:<{$p.height}>px;<{/if}>margin:0px 2px;"></a>
</li>
<{/foreach}>
</ul>
<div class="clearfix"></div>
<a class="tadgallery_carousel_prev" id="foo2_tadgallery_carousel_prev<{$block.view_csn}>" href="#"><span>prev</span></a>
<a class="tadgallery_carousel_next" id="foo2_tadgallery_carousel_next<{$block.view_csn}>" href="#"><span>next</span></a>
</div>
<{/if}>
<{foreach from=$block.pics item=p}>
<script>
$(function(){
$('.tad_gallery_colorbox_<{$p.photo_sn}>').colorbox({rel:'group', photo:true, maxWidth:'100%', maxHeight:'100%', title: function(){
// var sn = $(this).attr('title');
return '<a href="<{$xoops_url}>/modules/tadgallery/view.php?sn=<{$p.photo_sn}>#photo<{$p.photo_sn}>" target="_blank"><{$smarty.const._MB_TADGAL_VIEW_PHOTO}></a>';
}});
});
</script>
<{/foreach}>
在測試看看,點選燈箱效果,看看sn是否有值

確認紅框的sn是有數值的,然後點看看進到內容頁是否正確顯示圖片!

確認每張圖片都能進到對應的內容頁面中,圖片也能正常顯示,燈箱也能正常運作,搞定可以跟客戶交差了,真感動,有需要的朋友參考看看喔
教學撰寫:徐嘉裕 Neil hsu
留言
張貼留言